

If you’ve spent any time on #WritingCommunity Twitter, you’ve probably seen authors sharing their “book aesthetics” for their WIPs and pitches. Some agents even have an option to link them to your aesthetic when you query them! But if you’re like me, you’re not a graphic designer or an artist, and the first time you saw these gorgeous images popping up, you may have felt a little intimidated.
Not to worry! It’s not as hard as it looks to create a beautiful image set that hypes you and potential readers up for your book project. Even better, there are browser-based tools available for free that can help you do it. In this post, I’m going to share a detailed step-by-step tutorial on how to create an aesthetic using Canva, a free design tool that is fairly intuitive to use, and Pexels, a free image archive.
Disclaimer: I am not an expert or a professional. I have some experience as an amateur creating graphics for online blogs using Photoshop and Painter, but no formal training. None of that is necessary to do this!
Here are some helpful guides from other authors whose tutorials informed this post:
- What Is a Book Aesthetic and Why I Made One for My Novel from Tina Hogan Grant
- How to Create a Killer Novel Aesthetic from Kellie Michelle Parker
- How to Market with a Book Aesthetic from Ari Meghlen
Also see this Twitter thread for a more nuanced guide to the “aesthetic” side of aesthetics.
Step 1: Create a Canva Account
Canva is free to use, versatile, and browser-based. You can download your designs or save them in your Canva account. It also provides premium functions that require a monthly subscription, but I didn’t subscribe and the site is perfectly functional without it.
It also has an autosave feature which is very helpful if your attention span is squirrelly like mine.

Photo by Pixabay on Pexels.com
Step 2: Start your design
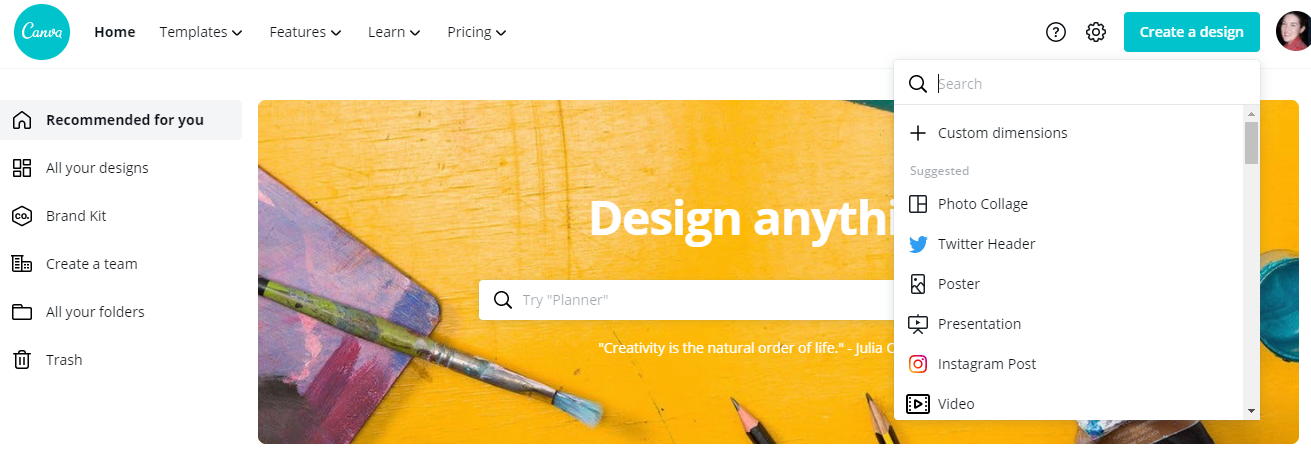
Once you’re signed in to Canva, click on the button in the upper right corner of the page that says “create a design.” I use “Photo Collage”–I had to search for it the first time, but now it shows up on my dropdown.
Step 3: Select a grid
It took me a minute to figure out how to do this when I first explored Canva, so I’m going to go in depth here. Once you’ve started your design, go to the menu on the left side of the screen and select “Elements.” Scroll down the list about halfway to “Grids” and click “See all.”

The grids are organized from least number of elements to most, so if you want an eight-photo layout like I did, scroll alllllll the way down. There are many options for layout.
Click on the option you want in the grids menu. Most aesthetics I’ve seen use a nine-photo layout. I personally like the equal squares but THERE ARE NO RULES.

Step 4: Choose your images
Now comes the fun part!
Canva integrates Pexels, which provides a ton of awesome free images you can use. I will be demonstrating that interface in this tutorial. You can also find images elsewhere (i.e. Pinterest), save them, and upload them to Canva.
If you’re using images from Pinterest, keep in mind that image attribution there can be tricky. Be careful and respectful of other’s creative work and copyright, especially if you’re using your aesthetic to market your work. /obligatory lawyer disclaimer

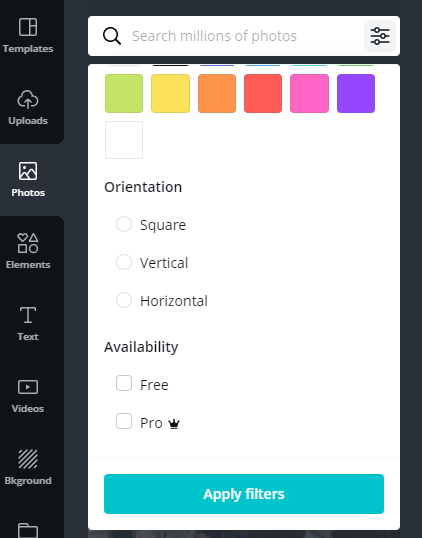
To use Canva’s image search, go to “Photos” in the menu on the left-hand side.
NON-PRO TIP: Before you start searching, save yourself some disappointment by using the filter option in the search bar to select “Availability: Free.” You can also filter by color scheme, but I tend to want to look at a wider variety of options first.

You may need to try a few search terms before you come up with good options. For instance, searching “science fiction” (without quotation marks) comes up with a lot of “science” photos. Use quotation marks to fine-tune multi-word search terms. Also, if your search term is too specific, you may not find any results, so experiment.
Once you find an image you like, click on it and drag it to your grid to place it. (If you just click it, it won’t auto-fill a space in the grid but sit on top of the layout.)
What kind of images should you include?
The sky’s the limit! But if you’re having trouble coming up with ideas for what to include in your aesthetic, here’s a list to start you off:
- Major characters – what do they look like in your head? (Hair, eyes, attitude, clothing…)
- Emotions central to your story
- Themes
- Pivotal scenes
- Important items (to your plot or characters)
- Settings where crucial plot points occur
- Genre (I’ve found a wealth of inspiration when just searching “fantasy,” for example)
- Metaphors or imagery (motifs)
You can create aesthetics for your novel as a whole, or you can focus on certain characters, settings, or relationships.
Choosing the right images
This is where the process gets very subjective. There may be several images you like for a certain concept you want to include. In selecting an image, consider not just how closely it represents your story but how it contrasts with and complements the rest of your composition. You may want everything in a similar color scheme, or you may want to find contrasting colors to add drama.
However, if you can’t find the perfect image, there are also ways to manipulate an image to get it closer to your vision. You can play around with the placement of your images in the grid to achieve balance and contrast. More on that in the next section!
Step 5: Editing and Fine-tuning
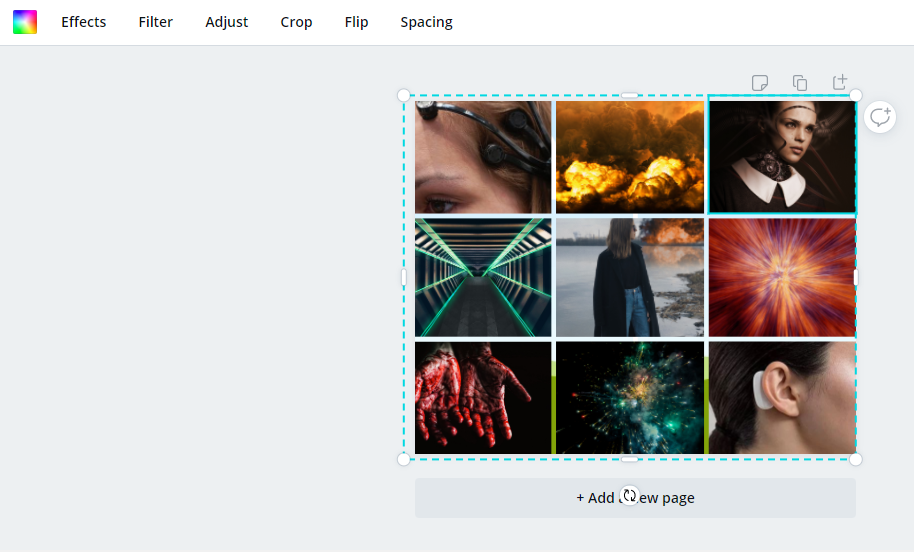
Once you’ve selected an image (or all your images) you can use Canva’s editing tools to adjust the composition of your aesthetic. To access the editing tools, click on one of the photos in your grid and a menu will appear at the top.
Cropping
I recommend playing with the crop tool first to increase the impact of your images and add interest. Only the part of the image within the grid lines will show up in the final product. When you drag the image to resize it, a grid will show up inside the frame. Use this to center the focal points of your image. The points at which the grid lines intersect are good spots to align your focal points.
I’m personally a fan of off-centering faces so they are half-in, half-out of frame. I probably do it way too much but I love how it looks and I think it adds interest.

The way you crop an image can change its meaning and effectiveness, so try it out when you’re “meh” on an image you’ve selected.
Composition
You may want to play around with putting the images you like in certain squares. I think about patterns when I do this. The top and bottom, right and left sides of the grid may reflect each other. Or I might put character representations in the corners and settings to the sides with an image that represents an overall emotion in the middle.

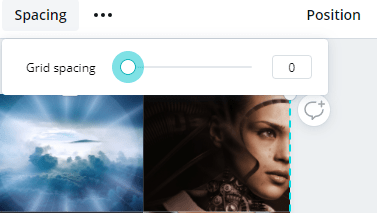
Spacing
To avoid gaps in the image between the photos, as in the example above, use the “Spacing” option on the top ribbon and use the slider to reduce spacing to 0.
Text
I like my images to speak for themselves, but many people like to add text to their aesthetics. You can use the left-hand menu to add a text box.

Once you add a text box, the ribbon on the top of the workspace will change to allow you to edit your text, select fonts, change the text color, or add effects like a shadow or outline.

Step 6: Add Filters
This is really part of the above step and uses the same menu, but it’s important enough to stand alone as its own step. Using image filters on your aesthetic can balance it out, make the colors pop, and bring a different feeling to both the sum and its parts.
Select the square you want to use a filter on and then choose the “Filters” option in the top ribbon.

Some filters brighten or darken the image, some will increase or reduce contrast, and others will adjust the levels or saturation (color to black and white.)
There is also a slider under the filter icons you can use to increase or decrease the effects. It defaults to 50, though, which is usually about right IMO.

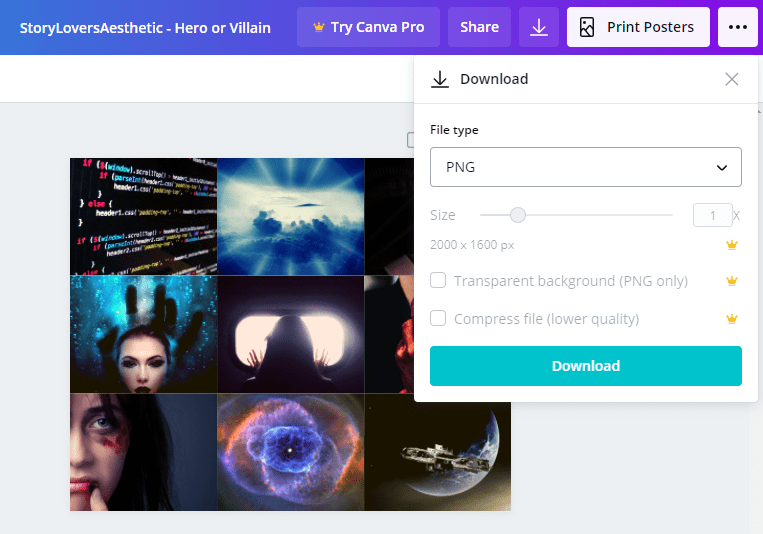
Step 7: Download your aesthetic
When you’re satisfied with your aesthetic, use the button with a downward-pointing arrow at the top right-hand corner of your Canva workspace to download your image to your computer. You can also change the name of the image at the top of the page and it will save to your Canva account and your computer under this name.
Choose the file type PNG or JPG when you download it.
And there you have it! You can now upload your aesthetic as an image to Twitter or your blog.
I love making these, especially when I’m feeling uninspired by my work in progress, because it engages a different part of my brain than writing does and can help remind me why I’m excited about my project.
Leave your questions down below in the comments and I’ll do my best to answer them!

Oooh, I’ve never played with filters in Canva. I’m going to try that out for my next project!
LikeLiked by 1 person
Definitely try it! It makes a HUGE difference in the vividness and “mood” of the colors/images.
LikeLike